How Aerial Fiber Optic Cable is Installed and How Much Does It Cost?
Short Answer: Installing aerial fiber optic cables involves stringing the cable between utility poles or towers using special equipment and securing it above ground. The process is efficient for long-distance connections in both urban and rural areas, but the cost depends on factors like the distance, pole access, and labor. On average, the cost of aerial fiber installation ranges from $15,000 to $30,000 per mile, though prices can fluctuate based on the complexity of the installation and location.
What Is Aerial Fiber Optic Cable?
Aerial fiber optic cable is a type of fiber optic communication line suspended between poles, often in outdoor environments. Unlike underground cables, aerial cables are hung on utility poles or other structures. This method is often used in rural and suburban areas or along roadways to provide high-speed internet, telecommunications, or network services.
Aerial installation is often preferred due to its lower cost and faster installation time compared to underground cables, making it a practical solution for long-distance connections.
How Is Aerial Fiber Optic Cable Installed?
The installation of aerial fiber optic cables follows a multi-step process. Here’s how it works:
- Planning and Site Survey: Before installation, a site survey is conducted to assess the landscape, determine pole spacing, and ensure compliance with local regulations. Engineers calculate the tension and sag for the cables, especially considering environmental factors like wind and temperature.
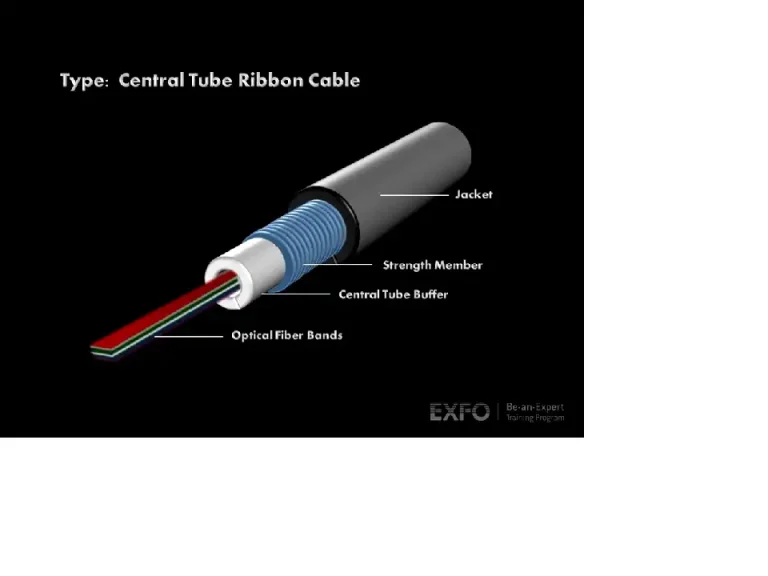
- Cable Preparation: The fiber optic cable is equipped with specialized materials, such as a messenger wire (a steel or fiberglass wire), to support its weight. These messenger wires are crucial in providing strength and durability to withstand external forces like wind.
- Installation of Utility Poles (if required): If there are no existing poles, new ones are installed along the route. In cases where poles already exist (as with telephone or electrical lines), these are typically shared, reducing the cost.
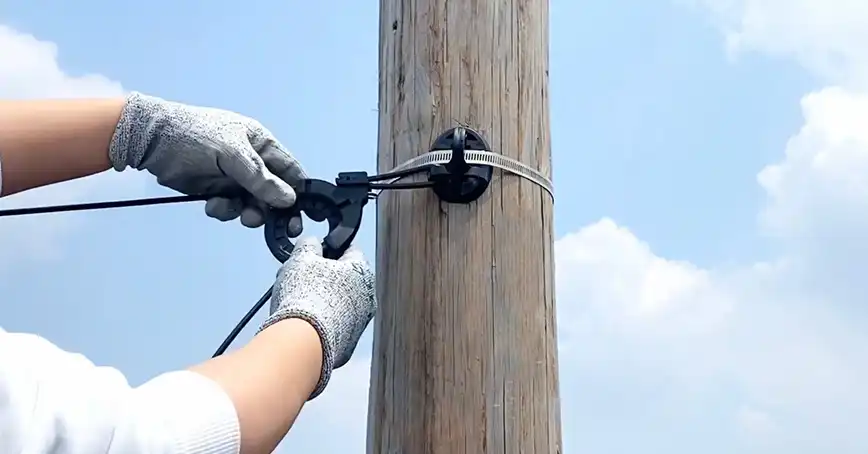
- Stringing the Cable: Workers use bucket trucks or aerial lifts to suspend the fiber cable between poles. Drones are also sometimes used for this process, particularly in remote or difficult-to-reach areas. The cable is attached to the poles using lashed or tensioned clamps.
- Tension and Sag Adjustments: Once the cable is strung, tension is carefully adjusted to prevent sagging and ensure the cable is at the proper height above the ground. Engineers calculate these parameters to ensure the cable can handle weather-related stressors like snow, wind, and temperature fluctuations.
- Splicing and Testing: The next step involves splicing (joining sections of the cable) and connecting the fiber strands to ensure data transmission. Specialized equipment is used to ensure that signal loss is minimal. After splicing, the cable is tested for signal quality, and any adjustments or repairs are made as needed.
What Are the Advantages of Aerial Fiber Optic Installation?
- Lower Installation Cost: Aerial cables are less expensive to install than underground cables because they don’t require trenching or digging.
- Faster Deployment: Aerial fiber cables can be deployed much faster since no underground boring or trenching is needed, especially over long distances.
- Easy Access for Repairs: Since the cables are suspended above ground, they are easier to access and repair, especially in the event of a failure or break.
How Much Does Aerial Fiber Optic Cable Installation Cost?
The cost of aerial fiber optic installation depends on several factors, including location, terrain, and labor. Here’s a breakdown of the costs:
- Material Costs: The price of aerial fiber optic cables ranges from $1 to $2 per foot, depending on the quality and type of cable. Messenger wire and supporting materials add to this cost.
- Labor Costs: Labor typically accounts for a significant portion of the installation cost, ranging from $5,000 to $15,000 per mile. More complex installations—such as those requiring additional pole work or working in tough environments—can push these numbers higher.
- Utility Pole Access: If new utility poles need to be installed, this can increase the overall cost. Renting pole space from utility companies may add a recurring expense, depending on local agreements.
- Distance: Longer distances naturally increase the overall cost. A typical aerial installation might cost between $15,000 to $30,000 per mile, but this can vary based on region and complexity.
| Cost Factor | Estimated Price |
| Aerial Fiber Cable | $1 to $2 per foot |
| Labor Costs | $5,000 to $15,000 per mile |
| Total Installation Cost | $15,000 to $30,000 per mile (or more for complex areas) |
Are There Any Additional Costs to Consider?
Yes, additional costs may arise depending on the complexity of the installation. Some of these include:
- Pole Leasing Fees: If you’re using existing poles owned by a utility company, they may charge a rental fee for using their infrastructure. This can be a one-time cost or an ongoing monthly/annual fee.
- Permits and Regulations: Some areas require permits for aerial installation, especially in urban environments. These permits can add extra time and cost to the project.
- Maintenance: While aerial cables are easier to repair, they may be more susceptible to weather damage and will require regular maintenance, which can incur additional long-term costs.
Wrapping Up
For long-distance fiber installations, particularly in rural areas or along roadways, aerial fiber optic installation is a cost-effective and efficient method. It offers faster deployment, easier access for repairs, and lower upfront costs compared to underground options. However, it can be vulnerable to environmental factors like wind and storms, meaning maintenance costs could be higher over time.
The total cost for aerial fiber optic installation typically falls between $15,000 to $30,000 per mile, but this figure can increase depending on the specific requirements of your project, such as labor, pole access, and cable quality.