ADSS Fiber Installation | A Quick Guide
Are you looking to upgrade your internet or communication network? If so, you might have come across the term ADSS fiber optic cable. This type of cable is gaining popularity due to its unique characteristics and advantages over traditional fiber optic cables. In this guide, I’m about to explain what ADSS fiber optic cable is, its applications, and provide a quick guide on how to install it. So, if you’re interested in installing this fiber optic, you’re welcome.
ADSS, which stands for All-Dielectric Self-Supporting, is a type of fiber optic cable designed to be self-supporting and weatherproof. Unlike traditional fiber optic cables that require additional support structures, ADSS cables can be installed aerially without the need for messenger wire or conduits. This makes them ideal for FTTH (fiber-to-the-home) deployments, long-distance communication networks, and installations alongside power lines.
What You Should Consider Before Installing ADSS Fiber?
Getting ready for an ADSS cable installation is like prepping for a successful road trip. First things first, you’ve to plan the route. That means surveying the area, getting all the permits you need, and picking the right cable for the job, considering the weather and how far it needs to stretch. Now consider the terrain and distance!
Once you’ve got the plan down, think of the safety concerns. Setting up clear zones and signage keeps everyone safe, and making sure you have easy access to your tools and crew is like packing all the essentials – you don’t want to be stuck in the middle of nowhere without the right gear! Planning and prioritizing safety will make your ADSS installation a smooth ride.
How to Install ADSS Fiber Cable?
When all the planning and arrangement are done, you can go for the actual installation process.
Step 1: Cable handling and deployment
Handling the cable right is key to avoiding any snags during installation. First things first, unload those cable reels carefully and set them up in the right spots. Then, to avoid kinks and tangles, unroll the cable using a figure-eight pattern as you lay it out. Once the cable’s all stretched out and ready, you can use temporary supports to string it between the poles
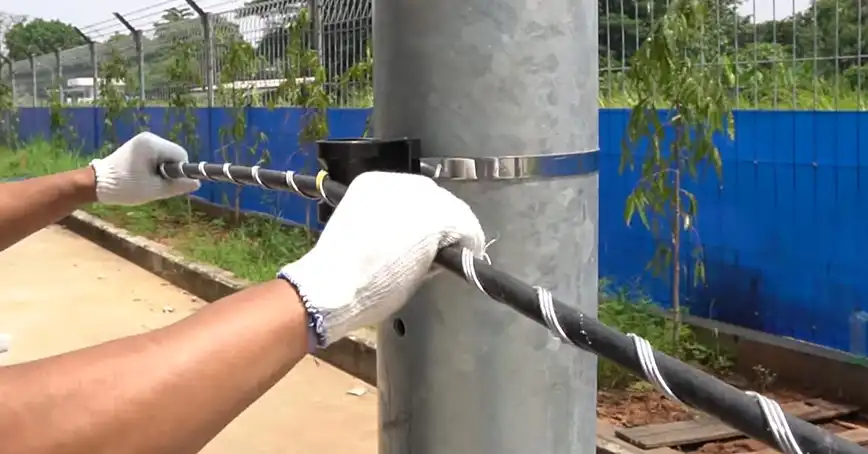
Step 2: Hardware installation and cable tensioning
Alright, so once you’ve got the cable strung and the hardware mounted, it’s time to tighten things up! There are different clamps for different spots on the line – tangents for straight sections, dead-ends for the poles where the cable stops, and suspensions for hanging in between.
Make sure you follow the instructions exactly for each type of clamp, just like following a recipe to make sure your dish turns out right. After that, it’s all about getting the cable nice and taut, but not too tight! You’ll need to adjust the tension to create the right amount of slack in the cable, following the manufacturer’s guidelines.
Step 3: Splicing and termination
Joining fiber optic cables is a delicate business, and doing it right is key to keeping your data flowing smoothly. There are special boxes and tools you’ll need to get the job done, and we can give you a basic idea of what’s involved. But for the actual splicing, it’s best to leave that to the pros. Trained technicians know exactly how to make those connections strong and reliable, so your signal stays crystal clear.
What Type Of Tests Are Involved While Installing ADSS Fiber?
After you get the cable all strung up, it’s not quite time to relax just yet. To make sure everything’s working as expected, you need to run some tests on the cable. Check things like signal strength, continuity, and give it a good visual inspection to catch any minor issues early on. This way, you can be confident the cable is in top shape and will deliver the best performance.
Also, keeping good records throughout the entire installation process is a smart move. Jotting down all the test results and details about the cable installation creates a valuable resource for whenever you need to do maintenance, troubleshoot any problems, or even upgrade the system in the future. It’s all about having a clear history to reference and avoid any surprises down the road.
What Security Concerns Should You Consider?
Safety is no joke when it comes to installing ADSS fiber. There’s a whole bunch of rules in place to keep everyone safe, from the crew doing the work to folks just walking by. Local authorities and industry experts have set these regulations, and it’s important to follow them to the letter.
For the crew, that means suiting up in all the right gear – hard hats, safety glasses, gloves, and clothes that make them super visible. Since ADSS installations often involve working way up high, using aerial lifts or platforms safely is a must.
And if you’re ever working near power lines, electrical safety becomes super important. Keep a safe distance from anything with a live current and follow all the guidelines for working around electricity. By following these steps, everyone involved stays safe and the installation goes smoothly.
Conclusion
Installing ADSS fiber optic cables can be a tricky business. There’s a lot to consider to make sure everything goes smoothly and works like a charm. This guide will walk you through the key steps for a successful installation that meets all the standards and gives you the best possible performance.
Remember, planning things out well from the start saves you time and hassle in the long run. Plus, a well-done ADSS installation means a more reliable network, fewer maintenance headaches, and super-fast data speeds. If you have any questions or get stuck along the way, don’t hesitate to leave a comment below. Thanks for reading, and good luck with your ADSS project!
Commonly Asked Questions
What is the typical lifespan of an ADSS fiber optic cable?
ADSS fiber optic cables are designed to be highly durable and weather-resistant. With proper installation and maintenance, they can have a lifespan of 20-30 years or more.
Can ADSS cables be used in underground installations?
While ADSS cables are primarily designed for aerial installations, they can be used in underground installations as well. However, additional protection measures, such as conduits or direct-buried installations, may be required.
How does the weight of ADSS cables compare to traditional fiber optic cables?
ADSS cables are significantly lighter than traditional fiber optic cables, as they do not require a separate messenger wire for support. This reduced weight makes them easier to install and lessens the strain on supporting structures.