How to Terminate COAX Cable without a Crimping Tool?
You know what’s frustrating? Needing to terminate a coax cable but not have that fancy crimping tool. I’ve been there, and it can be a real pain. But here’s the thing – you don’t actually need that tool to get the job done. Yep, you read that right! With a few common household items and some patience, you can terminate that coaxial cable like a pro. In this guide, I’ll help you to learn the step-by-step process, so you can say goodbye to signal issues and hello to crystal-clear connectivity. Trust me, it’s easier than you think!

Tools Needed for Terminating COAX Cable without a Crimping Tool
To properly terminate a coaxial cable without a crimping tool, you’ll need a few essential tools. Coax cable: The star of the show, obviously. Make sure it’s the right type for your application (RG6 is a common choice).
- Sharp knife or razor blade: Be careful with this one!
- Needle-nose pliers (optional): These can help with holding and manipulating the cable.
- Screw-on F-connector: This is the type of connector that will screw onto the prepared cable end.
- Sandpaper (optional): This can help smooth out any rough edges.
- Small block of wood (optional): We’ll get to why this is useful later.
- Hammer (optional): Again, only needed for a specific step.
Steps for Terminating Coaxial Cable without a Crimping Tool?
Terminating a coaxial cable without a crimping tool requires meticulous attention to detail and a steady hand. Here are the detailed steps to follow:
Strip the Coax Cable
Using your utility knife or cable stripper, carefully remove about 1 inch (2.5 cm) of the outer plastic jacket. It’s crucial to exercise caution during this step to avoid damaging the braided shielding underneath. Gently score the outer jacket in a circular motion, applying just enough pressure to cut through the plastic without penetrating too deeply. Once you’ve made a complete circle, you should be able to easily peel back the jacket, exposing the braided shielding.
Unbraid the Shielding
Once the outer jacket is cut, you’ll see a braided metal shielding beneath. Gently pull back the braid to expose the white dielectric insulator underneath. You can use your needle-nose pliers here to help grip and fold the braid back evenly. Don’t worry about being too perfect, but try to avoid any loose strands sticking out.
Carefully unbraid or unwrap the shielding, being cautious not to break or damage the individual strands. Unbraid it just enough to expose the inner insulation surrounding the center conductor, which is usually about 1/4 to 1/2 inch (0.6 to 1.3 cm).
Expose the Center Conductor
Next, you’ll need to remove a small portion of the inner insulation to expose the center copper conductor. Carefully cut a small portion (around 1/8 inch) of the white dielectric insulator to expose the center conductor. Be very precise here – cutting too much can damage the core and render the cable unusable.
It’s crucial to exercise extreme caution during this step to avoid cutting or nicking the delicate center conductor, as any damage can severely impact the cable’s performance.
Fold Back the Shielding
Once the center conductor is exposed, gently fold back the braided shielding so that it extends away from the center conductor. Try to create a smooth, cylindrical shape with the shielding, ensuring it doesn’t bunch up or twist. This step is essential for proper connectivity between the shielding and the connector.
Prepare the Connector
Take your F-connector and screw it onto the prepared cable end. Make sure the threads catch properly and that the connector sits flush against the cable jacket. Tighten it firmly by hand, but avoid over-tightening, which could damage the connector or cable.
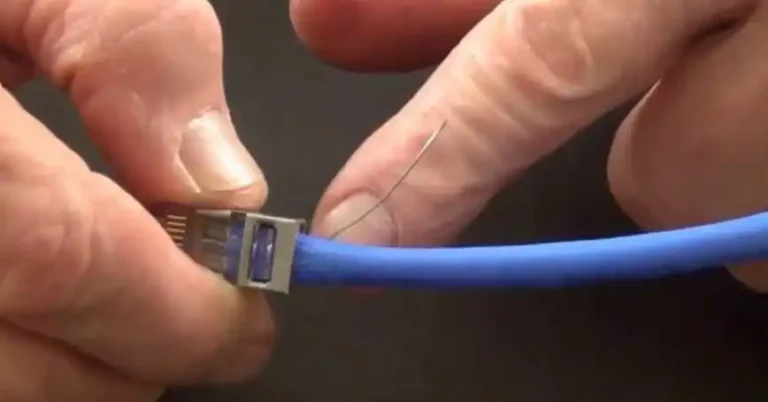
Insert the Cable into the Connector
Carefully insert the prepared end of the coaxial cable into the connector. Ensure that the center conductor goes through the center hole, and the braided shielding extends over the connector’s shielding area. This step is crucial for establishing a secure connection and ensuring optimal signal transmission.
Secure the Shielding (Compression Connector)
If you’re using a compression connector, slide the shielding portion of the connector over the braided shielding. You can compress it with a block of wood.
Find a solid base: If your F-connector has a compression ring, you can try using a small block of wood and a hammer to compress the ring onto the cable. Place the cable on the block of wood, with the connector facing up.
Gently tap, don’t smash: Carefully tap the compression ring with the hammer, using the block of wood as a buffer to avoid damaging the connector. Aim for firm but controlled taps, gradually compressing the ring until it sits snugly against the cable.
Secure the Shielding (Crimp Connector)
This method is not highly recommended and can significantly increase the risk of signal loss, shorts, and equipment damage. It should only be attempted as a last resort and with extreme caution.
Sand the connector: You can try roughing up the surface of the F-connector body (excluding the threads) with sandpaper to create some friction. This might help the braid grip better in the next step.
Tighten with pliers (use extreme caution): Using needle-nose pliers, very carefully try to squeeze the connector body onto the braided shielding. Apply minimal pressure and avoid deforming the connector or damaging the cable.
Seal with Electrical Tape
As a final step, wrap electrical tape around the connector and cable to provide additional protection and secure the connection. This not only helps to prevent moisture and environmental factors from interfering with the connection but also adds an extra layer of stability to the termination.
Throughout the process, take your time and be patient. Rushing or applying excessive force can lead to damaged cables or poor connections, resulting in signal loss or interference.
Is Crimping Tool Necessary for Terminating Coaxial Cable?
While a crimping tool is the preferred method for securing crimp-on connectors, as it provides a more consistent and reliable connection, it is possible to achieve a satisfactory result without one. By following the steps outlined above and using pliers to carefully crimp the connector onto the shielding, you can create a secure connection that will work for many applications.
However, it’s important to note that a crimping tool is designed specifically for this purpose and will provide a more professional-looking and long-lasting connection. If you plan to terminate multiple coaxial cables or require a more robust and permanent solution, investing in a crimping tool may be a worthwhile consideration.
End Notes
Alright, let’s wrap things up! You now know how to terminate a coax cable without that pesky crimping tool. Just remember to take it slow, follow the steps carefully, and don’t be afraid to double-check your work. With a bit of practice, you’ll be a cable terminating pro in no time!
If you still have any questions or need extra guidance, feel free to drop a comment below. I’m always happy to lend a hand and share more tips. Thanks for sticking around, and happy cable terminating! May your connections be strong and your signals crystal clear.